 Download DXF/SVG


A good college friend of mine is getting married, has an eye for unique graphic art (Design Major). I really had no intention of making a plasma-cut gift for her and her fiancé, but after being inspired by fellow member Russ K's awesome ocean-themed deck lantern, I knew I had to try and make something that they could cherish forever as a reminder of their love and the Light in Christ that they will represent together every day from this Saturday forward. Russ was very gracious to help me with a few questions I had about the build, and I will try to explain my process as well! (here is the link to Russ' Lantern) http://plasmaspider.com/viewtopic.php?f ... rn#p112458
Design Phase:
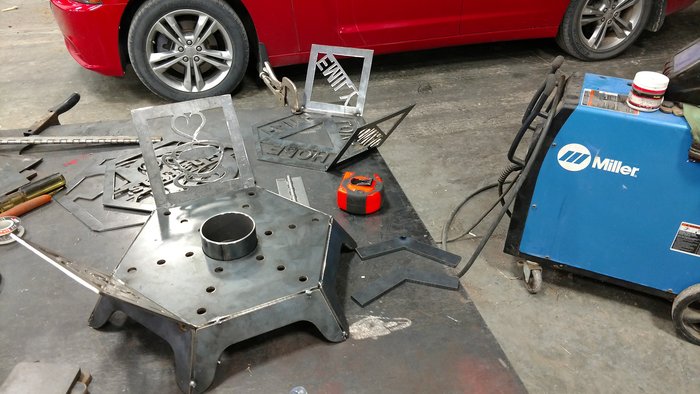
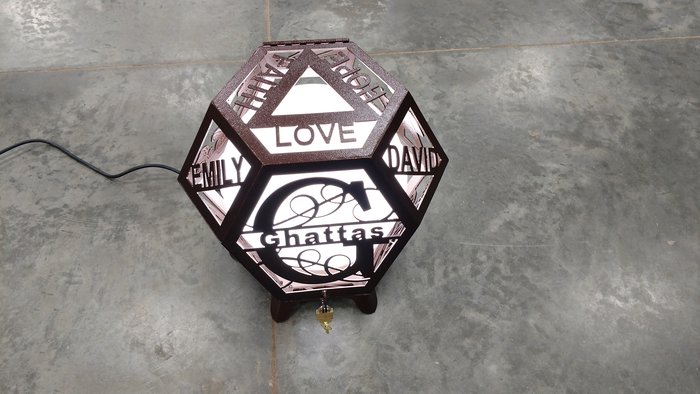
The shape of the deck lantern is a truncated octahedron, which has 8 hexagonal sides, and 6 square sides - 14 in total. This meant that minus the base, I would have 13 "tiles" to play with and try and come up with something meaningful to the couple. Solidworks is my primary design tool, and throughout this project I have learned a few tricks of the trade as far as text, importing and "cleaning up" dxf files, and even creating my own designs. I guess the easiest way for me to explain will be for me to go through each tile.
SQ1: Emily
SQ2: David
SQ3: 2017 - their wedding year
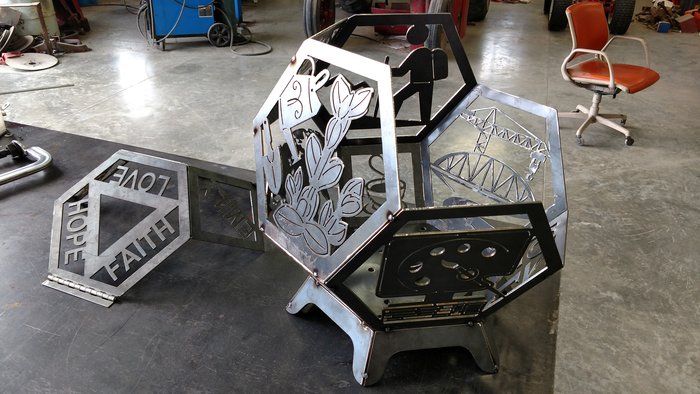
HEX1: I knew I wanted to do a split-monogram of their new last name for the front-and-center hexagonal tile - purchased all 26 letters from Etsy for $2.99, but this file required an ENTIRE re-draw via Solidworks to reduce nodes and noise, as well as thicken some of the curves to they wouldn't burn through during the plasma process.
HEX2: David comes from a Christian missionary family, and was born and spent his early childhood years in Egypt, and they both have been avid world travelers, so I found this very unique family tree/world map image I believe on Etsy. If I remember right, it was $2.99. Generally the file was pretty good, but for me to cut out the image in a hexagon with 6 1/4" , I spent an hour or so editing, re-tracing parts, and tying dropouts together in Solidworks.
SQ4: Matthew 5:13 (notice the location above "the earth")
HEX3: Often used bible passage from 1st Corinthians says 3 things remain -- in addition, the triangle - representing the tri-union God in the center of their life.
The rest of the tiles represent something about the couple individually, according to the side the tile is on, it means something about that person
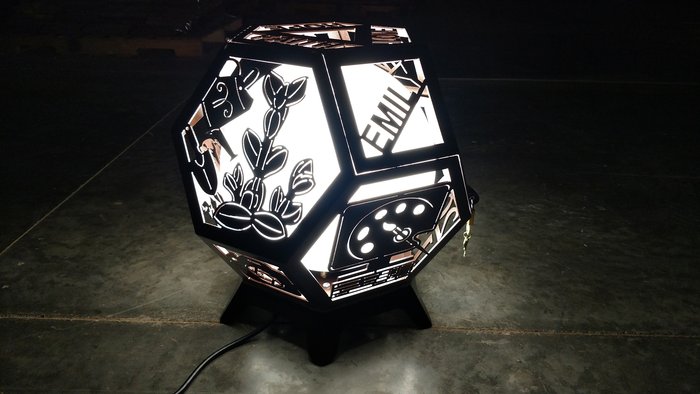
HEX4: Gardening/Succulent Plant - Emily drew a sketch of one of her succulent plants and sent it to me a couple years ago in a design portfolio, and so I took the liberty of scanning the image, completely tracing/re-drawing in Solidworks, and then attemping to add as much of the original detail as possible with open profile cuts.
SQ5: Photography - Emily (and also David) are avid photographers
HEX5: Artist's Palette/Computer - Emily was a graphic design major, and works as a graphic designer at a major Christian university.
HEX6: Hiking - David is an avid hiker and adventurer
SQ6: Coffee - David is what one would call a "coffee connoisseur" - this one was a google-search gem, that I ended up completely re-tracing
HEX7: Bridge/TowerCrane/Road - David is a civil engineer - two Etsy images, completely re-traced and added together in solidworks.
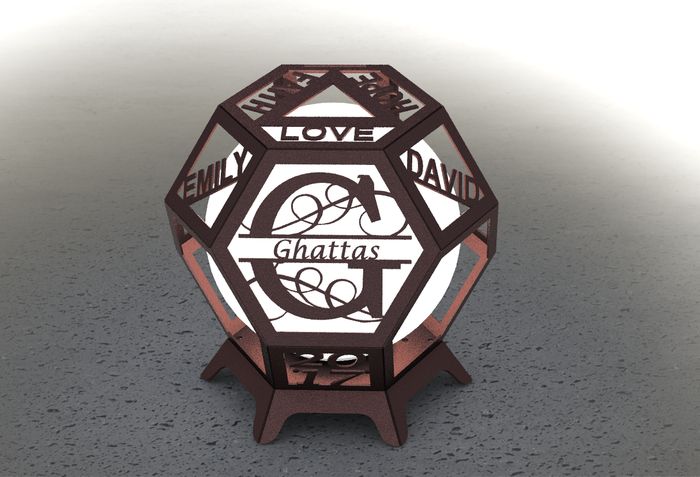
So in short, I modeled the lantern completely in Solidworks, including the lamp post topper and globe I was going to use on the inside. I decided on a 14" globe and a little larger design than Russ' lantern, because I needed a little extra room in my tiles for some of the detail I wanted to include. Heres an older screenshot I can find right off hand..
Build Phase:
Using all scrap pieces of 11GA and 7GA A36 left over at work, I starting cutting tiles. A few a day for a couple days in a row over my lunch hour. We have a Hypertherm 400XD machine on a Koike Aronson water table with Hypertherm THC. The 7GA (the base) cuts beautifully on the 80A process. In general this machine doesn't seem very good at cutting thinner material, but it does okay. I used the 50A process on the 11GA with the machine's programmed base ipm of about 60, but I think this is a little slow. Pretty much everything cut out well and only had a minor blowout on the succulent plant, but went with it anyway. The cutting time overall was about 52 minutes.
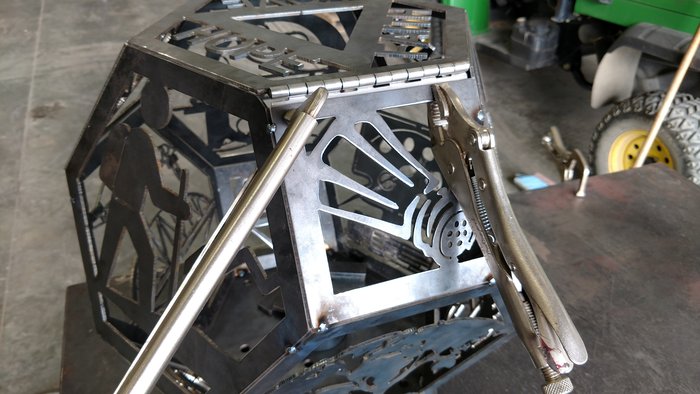
Before tacking any of the pieces together, I made "angle finders" for the different angles that the legs and tiles get welded on at. 120deg for the legs, 109.47deg for the hexagons, and 125.26deg for the squares. This nearly took all of the "tack and tweak" out of the build process and by my estimation saved a LOT of time. Once I got the majority of the tiles tacked on, I double checked that my globe was going to fit. It clears by about 1/4" or so on two of the sides, which is just perfect. I used a stainless steel piano hinge I had left over from another project to attach the "door" with, and then actually tacked the door to the rest of the lantern so it would not move or deform as I welded all of the other seams. Once welded, I used a flapper wheel to grind down the seam welds on the door and lantern, and then cut the tack welds where the door meets the rest of the lantern. Considering its my first time, I think the door fits great!
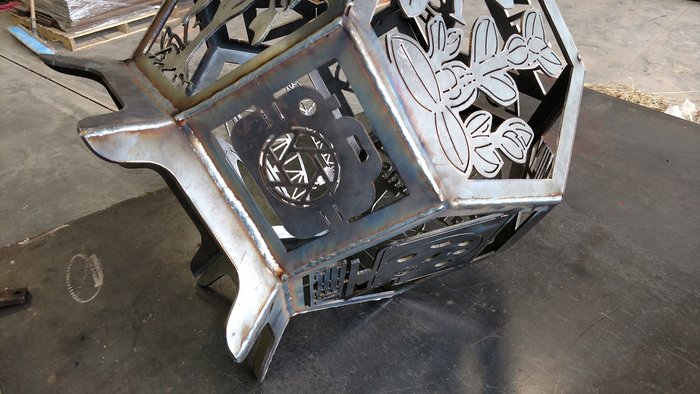
Next I added two little tabs on the door and lantern base so that a padlock could be used to keep the door from opening when picking it up. After that, I used a cabinet blaster to sandblast the metal to a rough finish to promote powdercoat adhesion. The powdercoat I used was an outdoor grade copper vein, and I'm very satisfied with it. Wiring the lamp post topper was pretty straightforward. Tapped a machine screw hole to attach the ground wire to, and a nice cord and heat-shrink took it from there!
Sorry about the small novel I just wrote!! While this took me way more time than I would like to admit, this is by far the neatest thing I have built, and I wanted to share with everyone! Comments and questions are always welcomed!
Now lets see if I can get some pictures and a few dxfs posted. Might have to do it in multiple posts.